

So, you've finally decided to give a particular room in your home or office a fresh new look. Wallpaper is an easy and affordable option to add a bit of dazzle to your décor. The easiest way to achieve the hottest look of the season is to use a pre-pasted wallpaper, whether paper or vinyl. By using a pre-pasted product, it decreases the messiness of installation and can be a huge timesaver. Perhaps, you aren't familiar with how to hang pre-pasted wallpaper. Listed below are some of the tools you'll need to create a fabulous new look in your chosen room.
Tools Needed:
- Wallpaper primer
- Spackle
- Pre-pasted wallpaper
- Stepladder
- Broad knife
- Utility knife
- Water tray or spray bottle
- Water
- Sponge
- Wallpaper smoothing tool
- Ruler
- Pencil or chalk line
Ok, now that you've gathered the needed tools for the task at hand, including your pre-pasted paper or vinyl wallpaper, it's time to start cracking away on your DIY project.
Prime Walls
With any DIY project, you'll always want the best surface to work with. Wallpaper installation is no different. Make sure you fill any holes or cover any cracks or imperfections with some spackling. This will ensure that you have the most blemish-free surface to create a smooth application later. If you do apply any spackling, make sure to smooth the surface once it has dried. You'll also want to remove any electrical outlets or switch plates. Make sure your power is off before removing either of these.

You'll also want to clean your walls with either water or a dust-free cloth. If you do need to use a cleaning solution or water, make sure you give your walls at least 24 hours to completely dry before application.
Although not required, painting your walls with a wallpaper primer is a good idea, especially if your wall surface is rough, textured, or has a glossy surface. Wallpaper primer will allow the new installation to adhere better to your wall. If your walls are relatively smooth or matte finish, you can still paint the walls with a basic primer to give your wallpaper a new foundation.
Measure Walls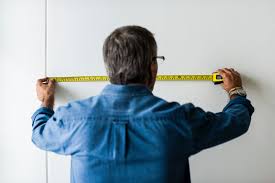
Time to measure the walls for your new project. Remember the old adage, "measure twice, cut once," it will serve you well here by avoiding too much-wasted wallpaper. Measure your walls from the ceiling to the top edge of your baseboards. Make sure to add a couple of inches in your length measurements to allow for any minor mistakes or adjustments. Mark your starting point with either a pencil and ruler or a chalk line. This ensures that you'll start out with a perfectly aligned strip making proper installation more manageable.
Measure Wallpaper
Now that you have the room specifications all written down, it's time to measure the actual wallpaper. Keep in mind of odd shapes or corners in the room. Also, make sure you match up any patterns to give your room a unified and professional look. This is why you'll want to leave a few inches on the ends to allow for pattern matching.
Prep Wallpaper
With pre-pasted vinyl wallpaper, gluing is a much more straightforward process. You'll need water, a water tray of some sort, or you can do the prepping with a spray bottle filled with water. Either method achieves the same thing, activating the adhesive on the wallpaper. With the water tray method, take one of the cut strips and place in a five-gallon bucket of waterwater tray. Or take that same strip and moisten with water from a spray bottle. Whichever method you use to activate the glue, you'll need to "book" the wallpaper by folding it in half with glue sides together. This keeps the glue from drying out and hopefully keeps the mess to a minimum. You can also fold the wallpaper in an accordion-style, being careful not to crease the wallpaper. It's especially helpful if you have larger strips to hang.
Install Wallpaper
Take your first strip and align it to the plumb line you drew. Make certain you leave a few inches overlapping the ceiling edge or molding. Working from the top down, take a wallpaper smoothing tool to remove any wrinkles or bubbles in your wallpaper. You may need to use a damp sponge to clean up any excess glue as you're moving down the wall. Once you have the first strip in place properly, take a broad knife, using it as a straight edge and cut along the top and bottom with a utility knife. This will give you a clean and professional-looking installation. Once the first strip is in place, take your next piece an align it with the pattern of the first installed piece. You may have to slide up or down to match correctly. This is why it is always best to leave a few extra inches on the length to give you the flexibility to align your pattern. You'll need to do this with each additional strip until completed.
Clean Up
After the installation of each sheet, you'll need to take a damp sponge and wipe down the edges, at a minimum, to remove excess glue.
See? Just a few simple steps, and now you know how to hang pre-pasted vinyl wallpaper. Adding wallpaper to any room can add a dramatic and classy look to any home or office. If you get bored with your look, this simple installation allows you to change the look on a whim without costing an arm and leg or taking weeks to complete. It is an all-around great way to add pizzazz to any room for the DIY'er.
If you're looking for ideas on wallpaper patterns, check out the following pages for some exciting new looks. Here at Limitless Walls, we have a variety of designs suitable for wallpaper or looks that are typical of many wallpapers.